|
Diesen Artikel vorlesen lassen
Getting your Trinity Audio player ready...
|
Colour profiles, bleeds and save options – small yet important details when creating JPEGs and TIFFs for print in Photoshop.
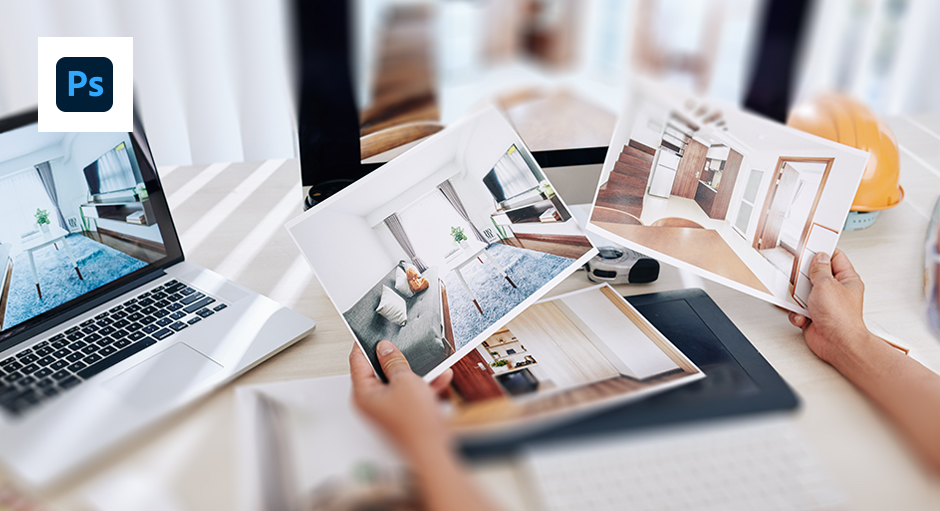
You probably already know that PDF is the preferred format for delivering print files to online print shops like FLYERALARM, not least because of all the different options it supports. Nevertheless, JPEGs and TIFFs can also be printed easily as long as you observe a couple of important details. These files can be created in applications such as Adobe Photoshop, the world’s leading image editing software. This tutorial explains the key settings that must be configured in order to obtain the best results in print. The guide and screenshots are based on Photoshop CC 2015.5 for Windows; the procedures for older versions and Mac users are almost identical.
Step 1: Install the ICC profile
To produce and export print files correctly, you need the correct ICC profile. Download the profile “ISO Coated v2” (for all advertising products) and “ISO Coated v2 300%” (for all other print products) from the section “ICC profiles from ECI (old versions)” at http://www.eci.org/en/downloads. To install these in Windows, right click the desired profile, then select “Install”. If you are using a Mac, copy the desired profile to the folder Library/ColorSync/Profiles/Recommended. You can then use the profiles in all of your software applications.
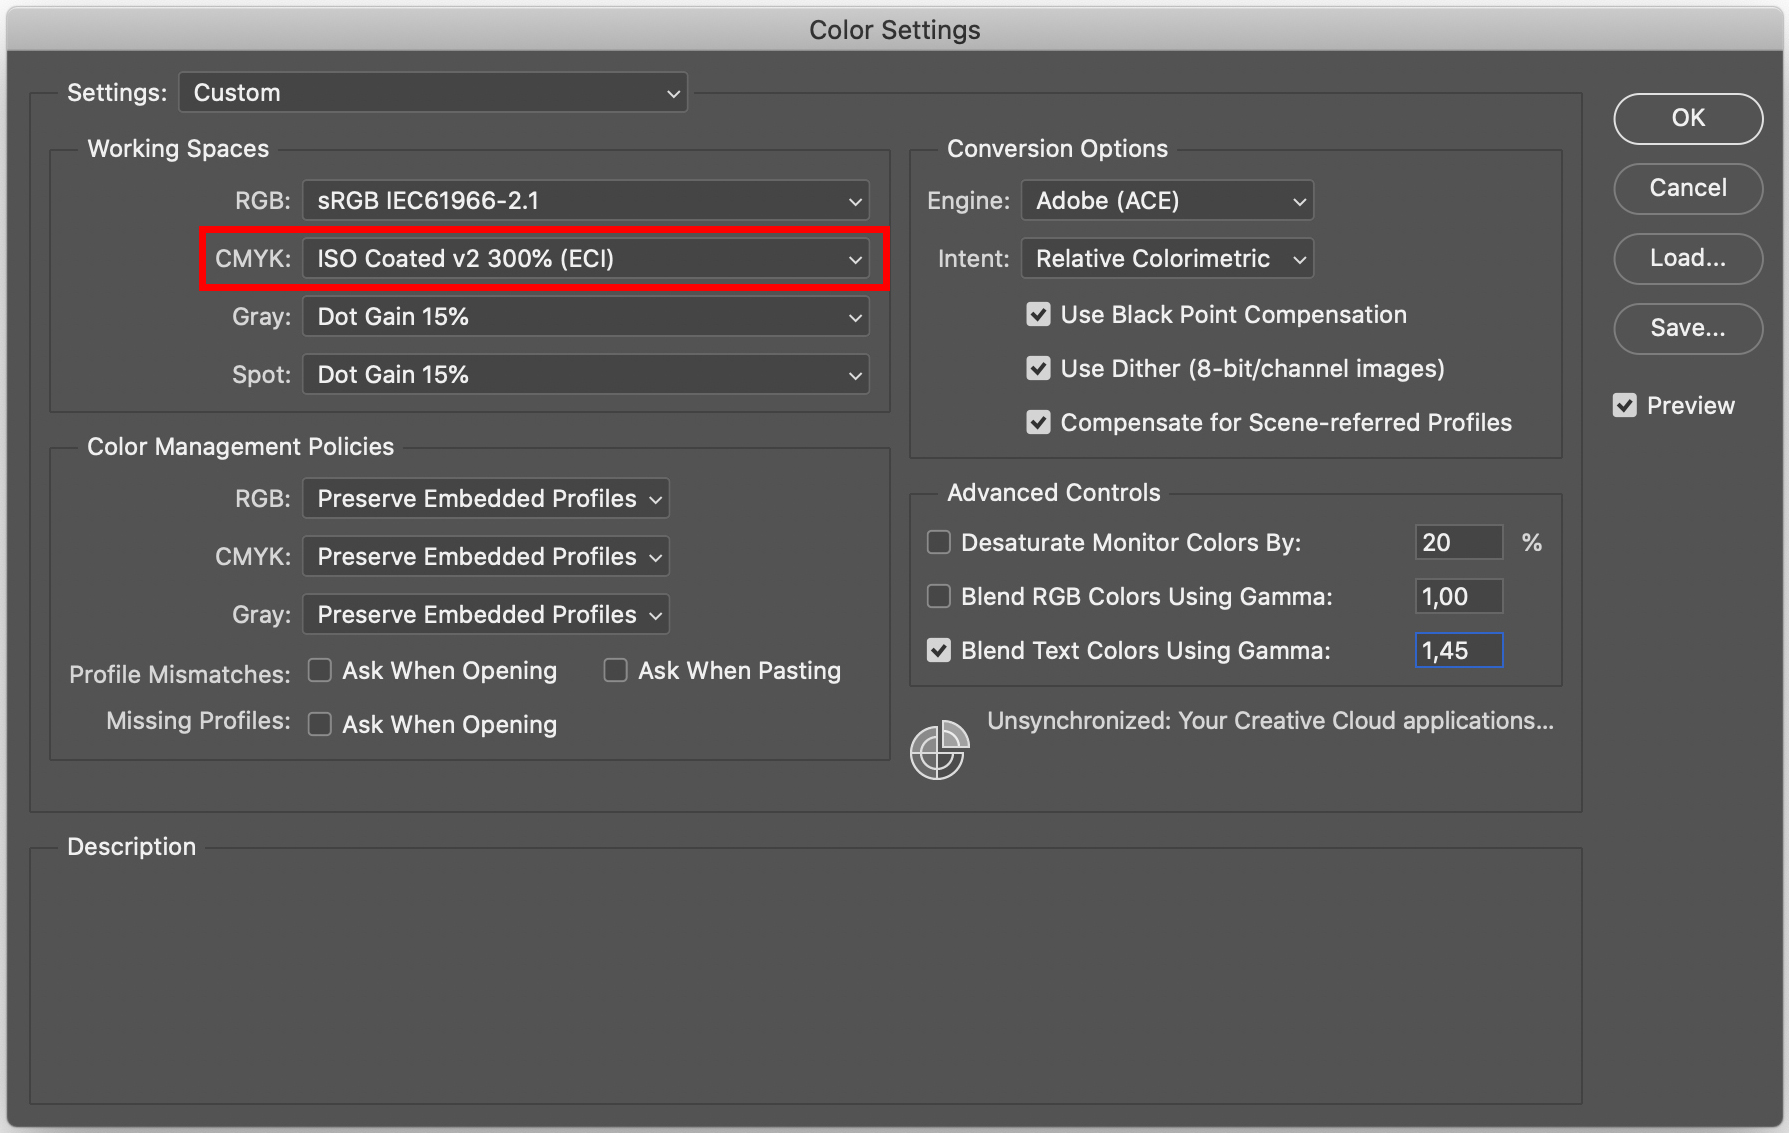
To ensure you are working with the correct colour profile in Photoshop, select the menu item Edit > Color Settings and configure the appropriate CMYK working colour space.
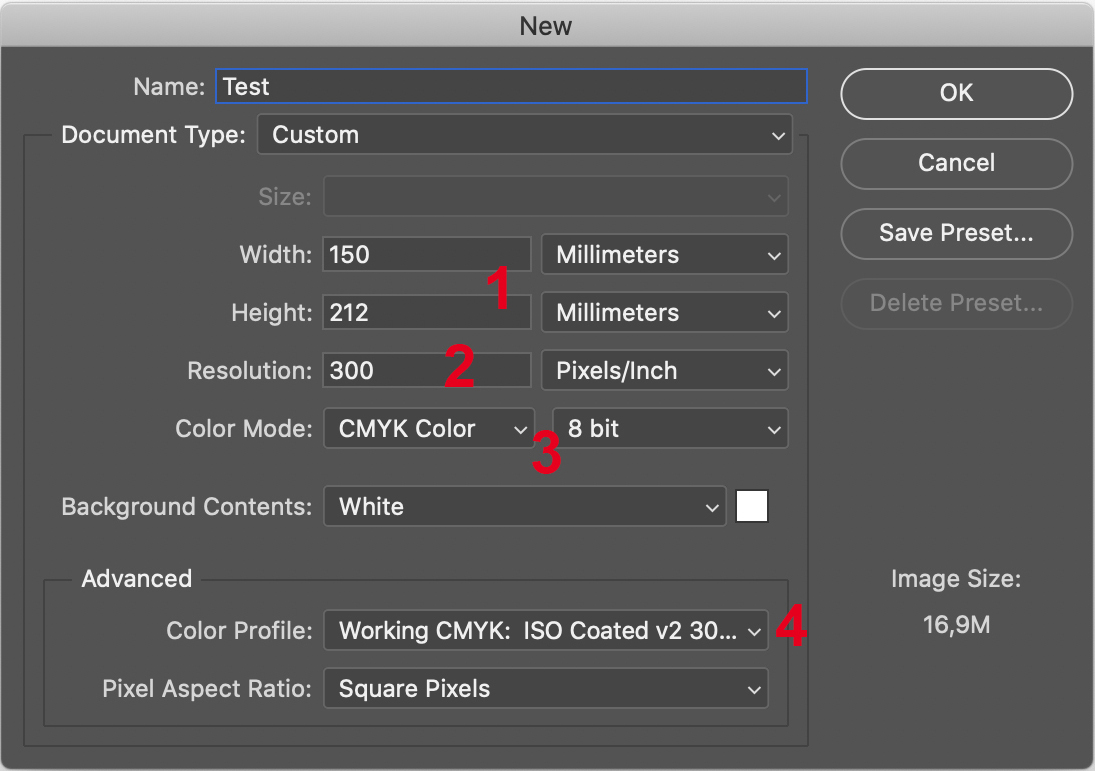
Step 2: Create your file
Set up the document dimensions and other properties first. Use the Width and Height options to set the document format (page size of the finished product including bleed settings) as specified in the product data sheet (1). In the example, we are creating an A5 flyer that requires a 1 mm bleed on each side. The resolution for print products is generally 300 dpi (dots per inch) (2). Exceptions to this rule can be found on the FLYERALARM website. Set the colour mode to 8 bit CMYK (3), the colour profile should automatically be set to “ISO Coated v2 300%” or “ISO Coated v2” depending on the setting made in step 1 (4).
Step 3: Save
Once you have completed the design of your product, select the File > Save as menu command and choose the file type JPEG or TIFF. In both cases, ensure that the check box is selected for the ICC profile.
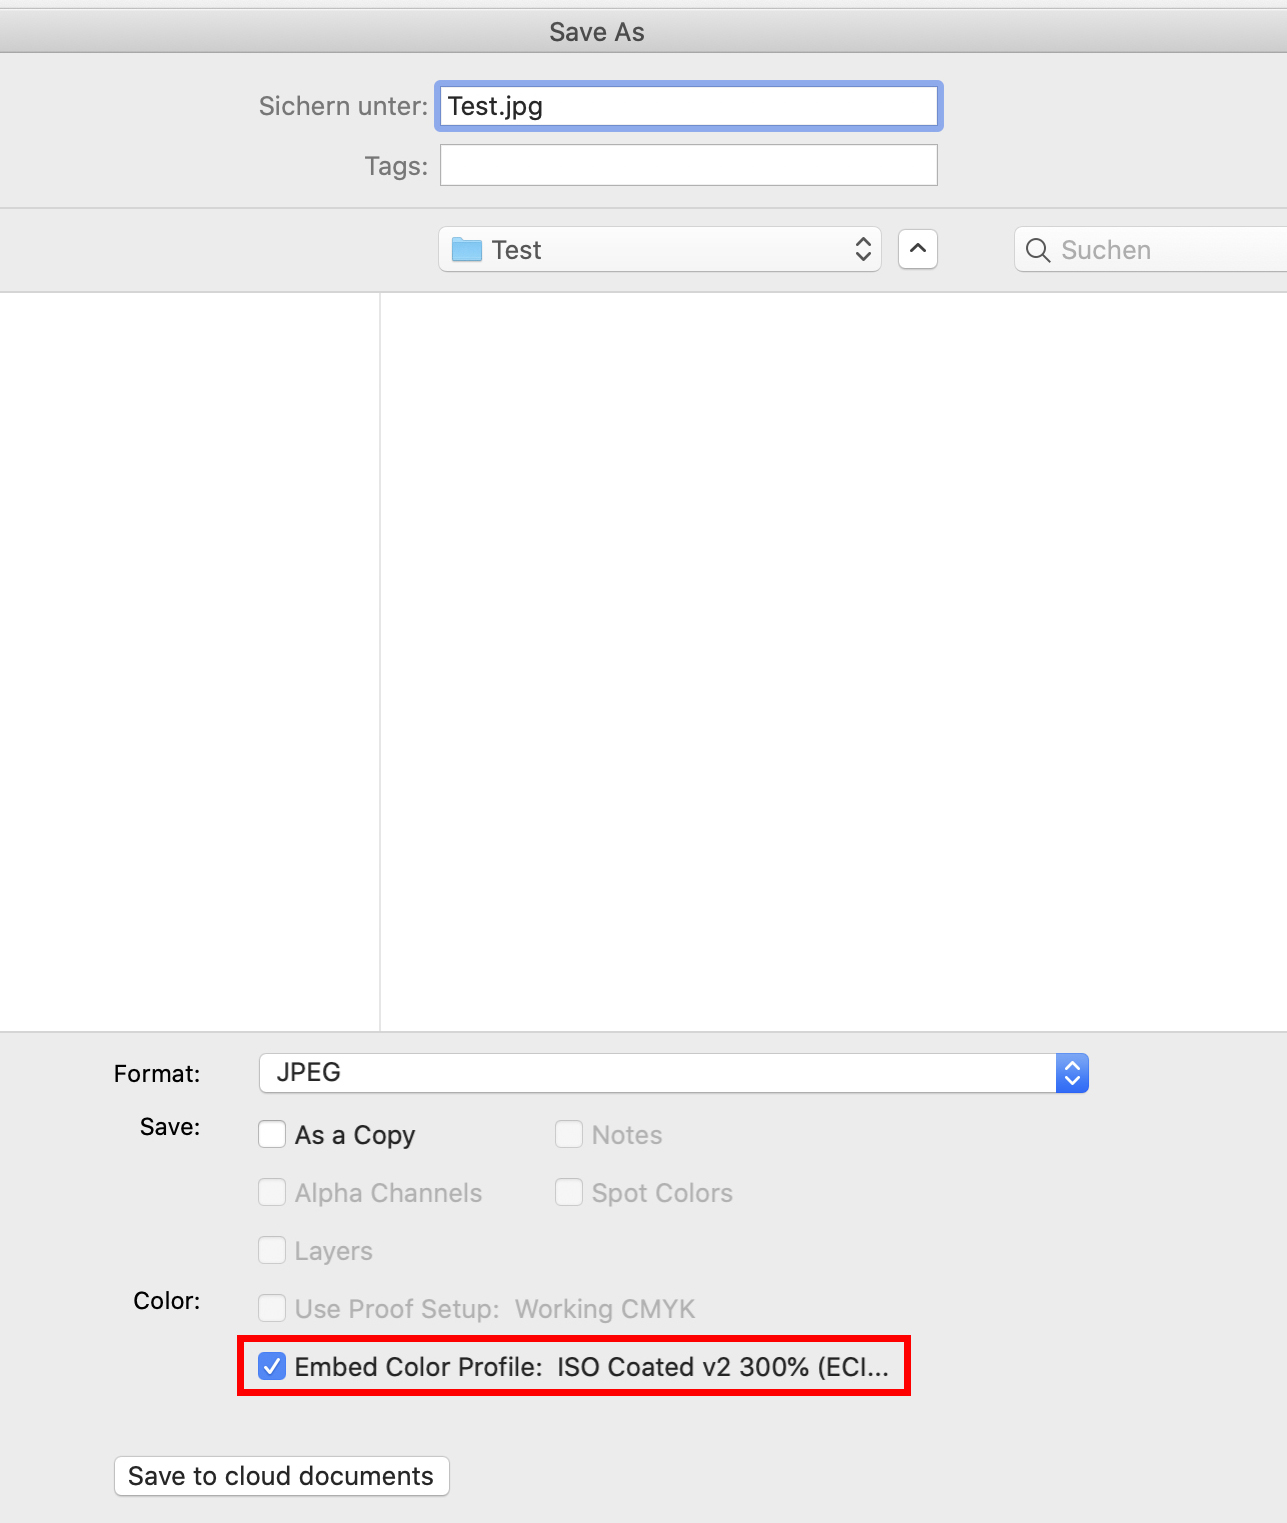
a) as JPEG
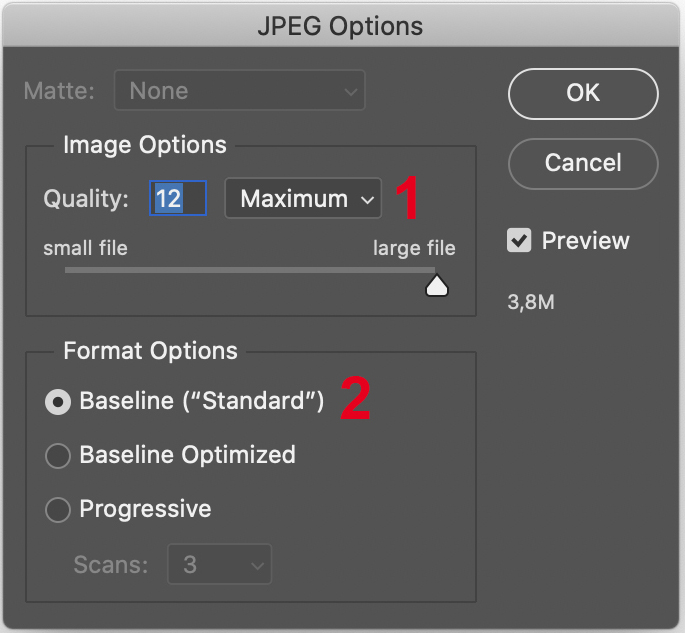
Set the image quality to “Maximum” and level 12 (1). For particularly large-format products such as posters or advertising products, a quality level of 8 or 10 may suffice. Please ensure that the format option “Baseline (Standard)” is selected (2). Then click on “OK”.
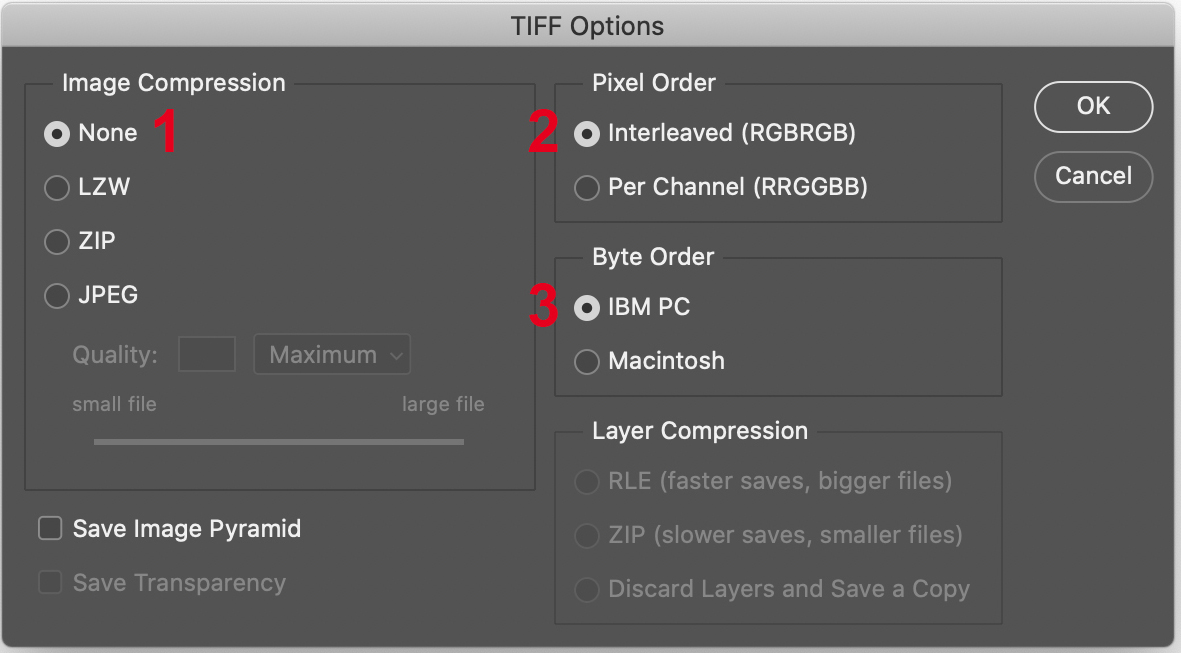
b) als TIFF
When saving as TIFF, configure the file options as follows in the window that appears: Set the Image Compression to “None” (1), the Pixel Order to “Interleaved” (2) and the Byte Order to “IBM PC” (3). Then click on “OK”.
Creative solutions for more than 900 products
Edit powerful images in Photoshop and use them as the designs for flyers, posters and postcards. These are only three of more than 900 products in more than 3 million variants that you can custom design using our online print shop.