A correctly generated and exported print file is essential for achieving the best print result for your product. Here are a few things to watch out for when creating artwork in InDesign.
For many years, Adobe InDesign has been the leading graphic design software for creating print files. It is particularly popular for designing products containing multiple pages or complex designs with special colours or finishes. Alongside the diverse design options, this software allows users to export the artwork in a range of formats. Correctly exporting data as PDF is the first step in achieving perfect print output. This tutorial contains a step by step guide for producing print-ready PDFs as required by your online print shop FLYERALARM for optimum results. The guide and screenshots are based on InDesign CC 2015 for Windows; the procedures for older versions and Mac users are almost identical.
Step 1: Install the ICC profile
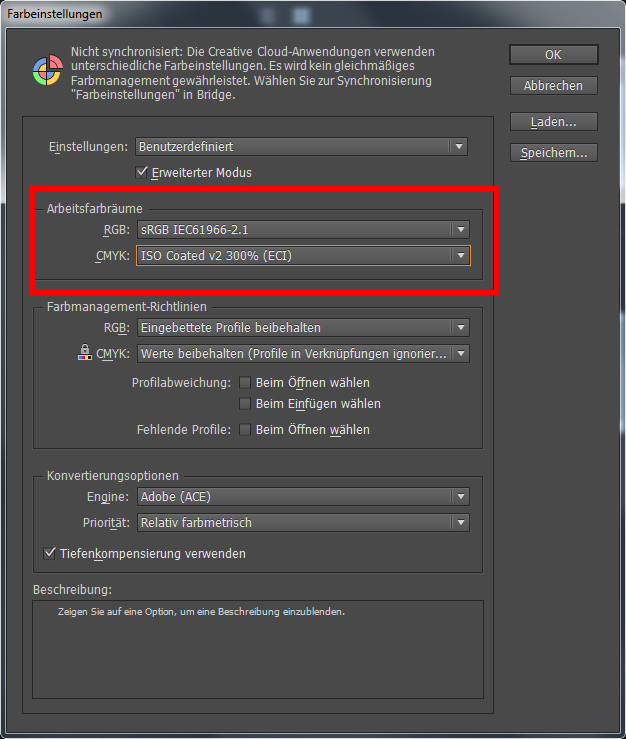
To produce and export print files correctly, you need the correct ICC profile. Download the profile “ISO Coated v2” (for all advertising products) and “ISO Coated v2 300%” (for all other print products) from the section “ICC profiles from ECI (old versions)” at http://www.eci.org/en/downloads. To install these in Windows, download and right click the desired profile, then select “Install”. If you are using a Mac, copy the desired profile to the folder Library/ColorSync/Profiles/Recommended. You can then use the profiles in all of your software applications.
To ensure you are working with the correct colour profile in InDesign, select the menu item Edit > Color Settings and configure the appropriate CMYK working colour space.
Step 2: Create your file
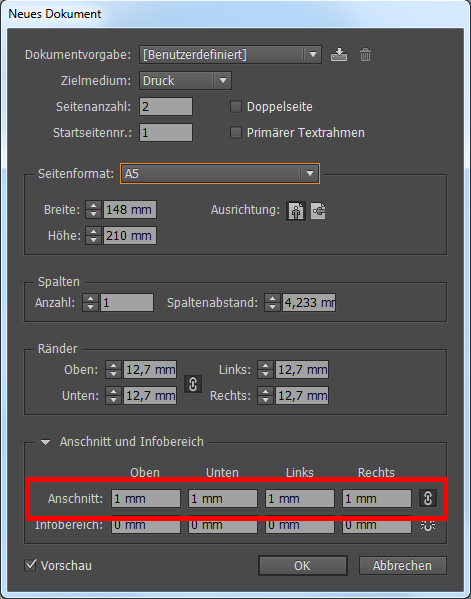
Set up the document dimensions and other properties first. Use the Width and Height options to set the size of the finished product and enter the bleed settings as specified in the product data sheet (1). In the example, we are creating an A5 flyer that requires a 1 mm bleed on each side. This is shown in the document as a red line; always place contents such as images, photographs and backgrounds up to the edge of this box.
Step 3: Export
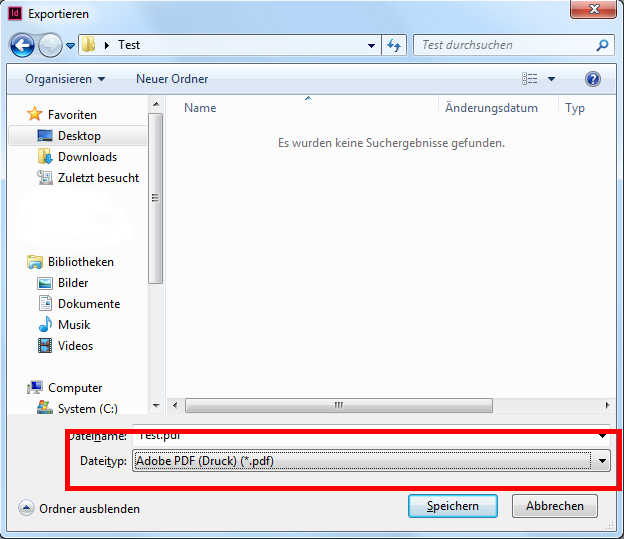
Once you have completed the design of your product, click the File > Export menu item. Enter a file name and then select the file type “Adobe PDF (Print)”. The software then displays the window containing export settings, including the following categories of options:
-
General
Files containing designs intended for printing on clothing or cotton bags are an exception to the above. They must be exported as PDF/X-4 files.
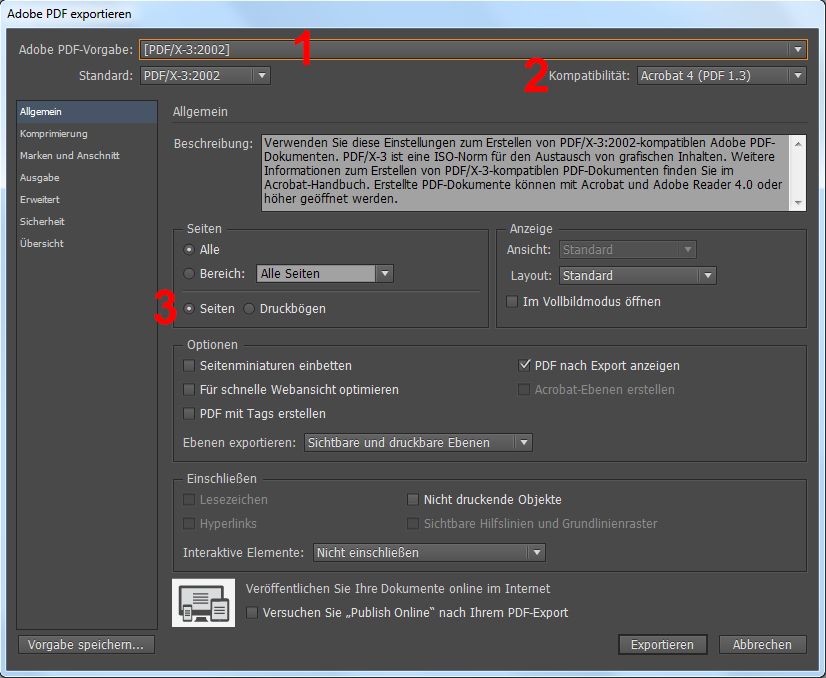
Select the Adobe PDF Preset “PDF/X-3:2002” (1) and ensure the Standard is set to “PDF/X-3:2002” and Compatibility is set to “PDF 1.3” (2). Make sure you set the Export As option to “Pages” and not “Sheets” (3).
-
Compression
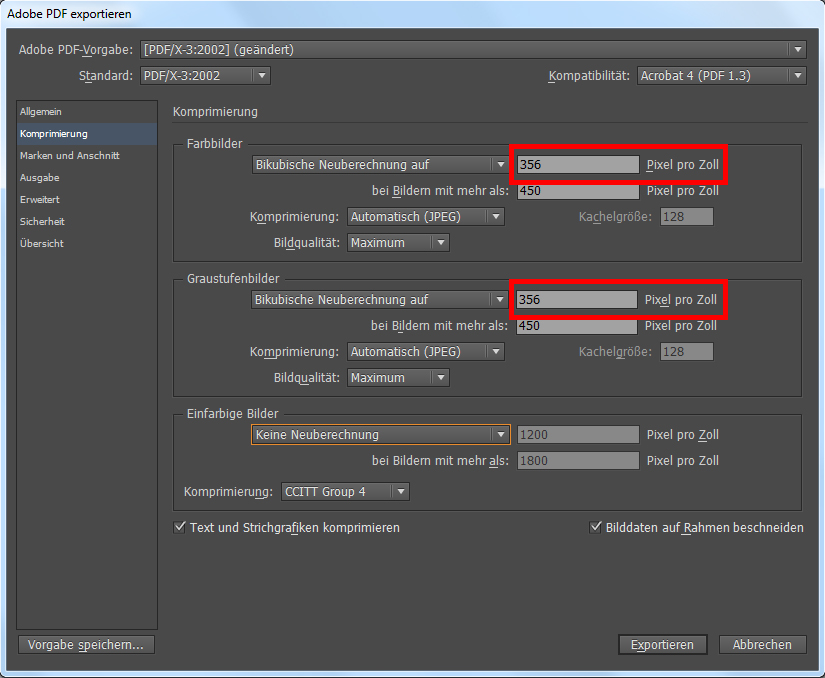
Set the Colour Image and Greyscale Image compression to “Bicubic Downsampling to” 356 pixels per inch.
-
Marks and Bleeds
To ensure that bleed settings are taken into account in the export, select the check box “Use Document Bleed Settings”. Please do not select any of the Marks.

-
Output
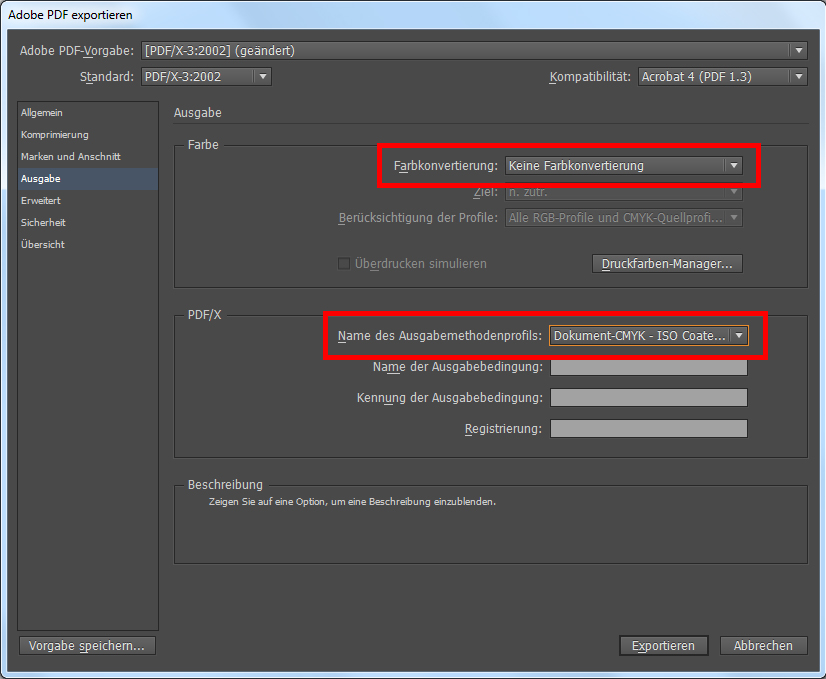
Set the Colour to “No Colour Conversion” and check that the Output Intent Profile Name is “ISO Coated v2 300%” or “ISO Coated v2”. The correct colour profile should actually already be selected by the setting applied in step 1 above.
-
Advanced
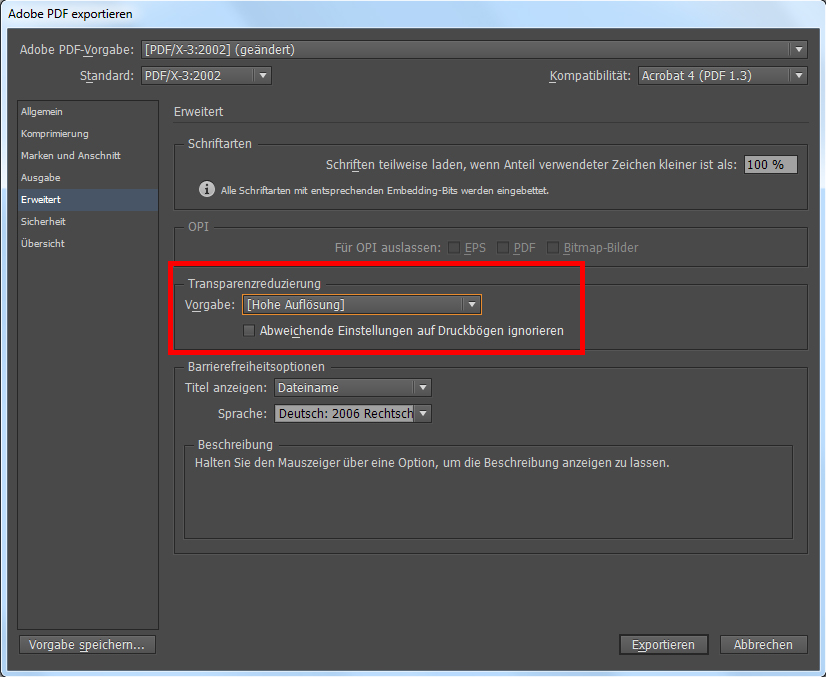
Check that the Preset setting for Transparency Flattener is set to “High Resolution”.
-
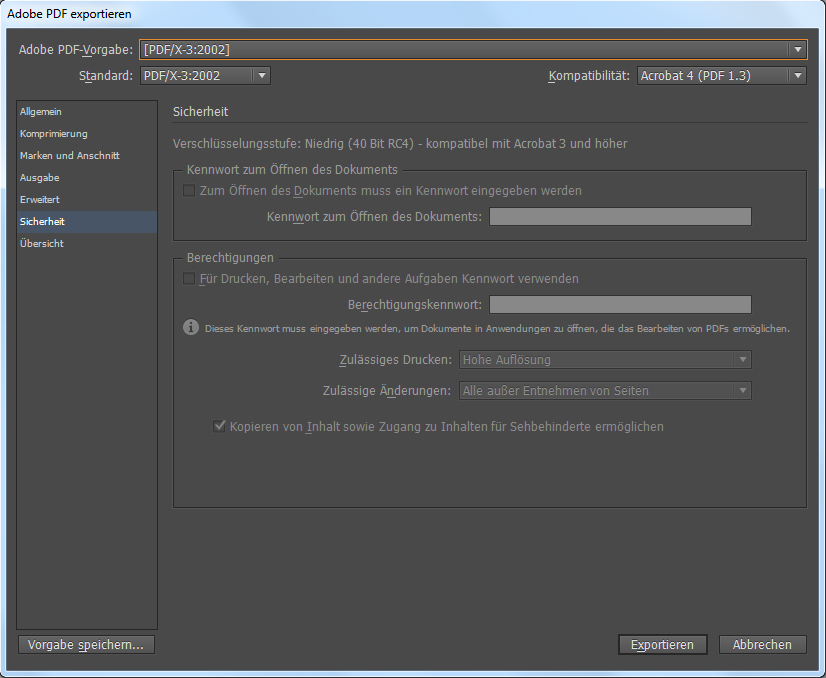
Security
If you have selected “PDF/X-3:2002” then this tab should remain blocked for entry, which is correct. If a password were needed to open and/or print the file we would not be able to process it.
-
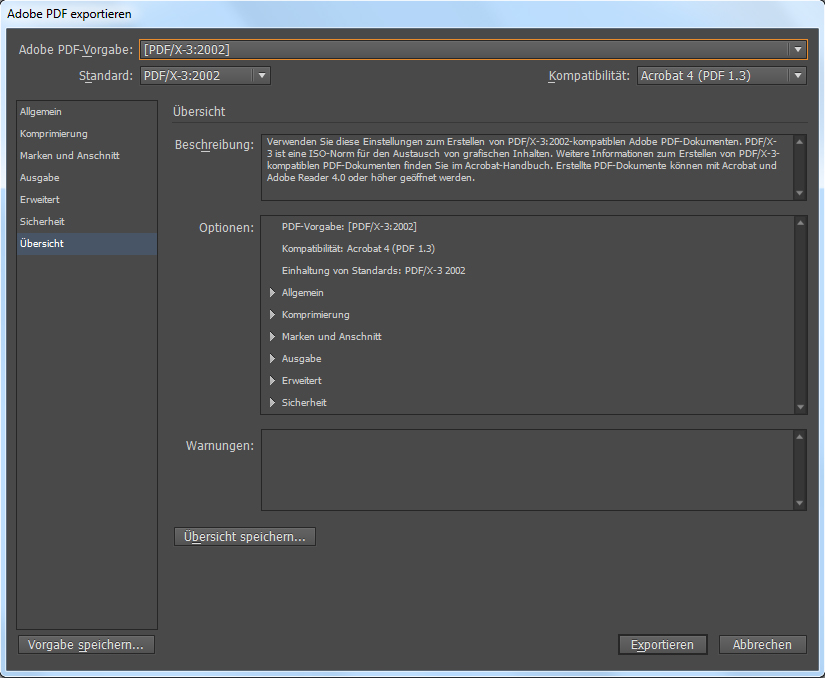
Summary
This tab summarises all of the settings that you have applied on the individual tabs. Any warnings are repeated here if the settings are not correct or do not make sense.
Once all of the settings have been applied, click “Export” to produce the print-ready PDF file. Read our blog article Check print files with Adobe Acrobat Pro XI to find out how to double-check this file before sending it to the print shop.
Practical alternatives: Productivity tools
Print-ready PDFs can be created and exported particularly easily using the FLYERALARM Productivity Tools plugin, which is available as a free download. It can be downloaded for versions of InDesign from version CS 6 and CC up to CC 2017. Alongside the templates for many products, including important settings such as size and bleed, margins and colour profiles, the PDF export process is made quick and easy thanks to an integrated Preflight function with preconfigured settings.
InDesign Productivity Tools