|
Diesen Artikel vorlesen lassen
Getting your Trinity Audio player ready...
|
An A5 flyer measures 14.8 x 21cm, but when creating your print file, the page size must be set to 15 x 21.2cm. Why do you need the extra 1mm on each side?
It is due to our batch printing process, which involves placing lots of order items on a single unfinished flat sheet. After printing, we separate the items from one another using a cutting knife. A certain tolerance is required since the individual order items are printed directly adjacent to each other. We don’t want to cut anything off, nor do we want a white margin around the edge. To avoid these issues, all print files must be created with a “bleed”. Depending on the size of the final page, this additional space may measure between 1 and 10mm. In the case of some formats, such as hard cover books, it is significantly more. As a result, the file format is always somewhat larger than the finished size. This article explains how to use the settings in InDesign CC and Illustrator CC to create your print files correctly.
InDesign
Step 1:
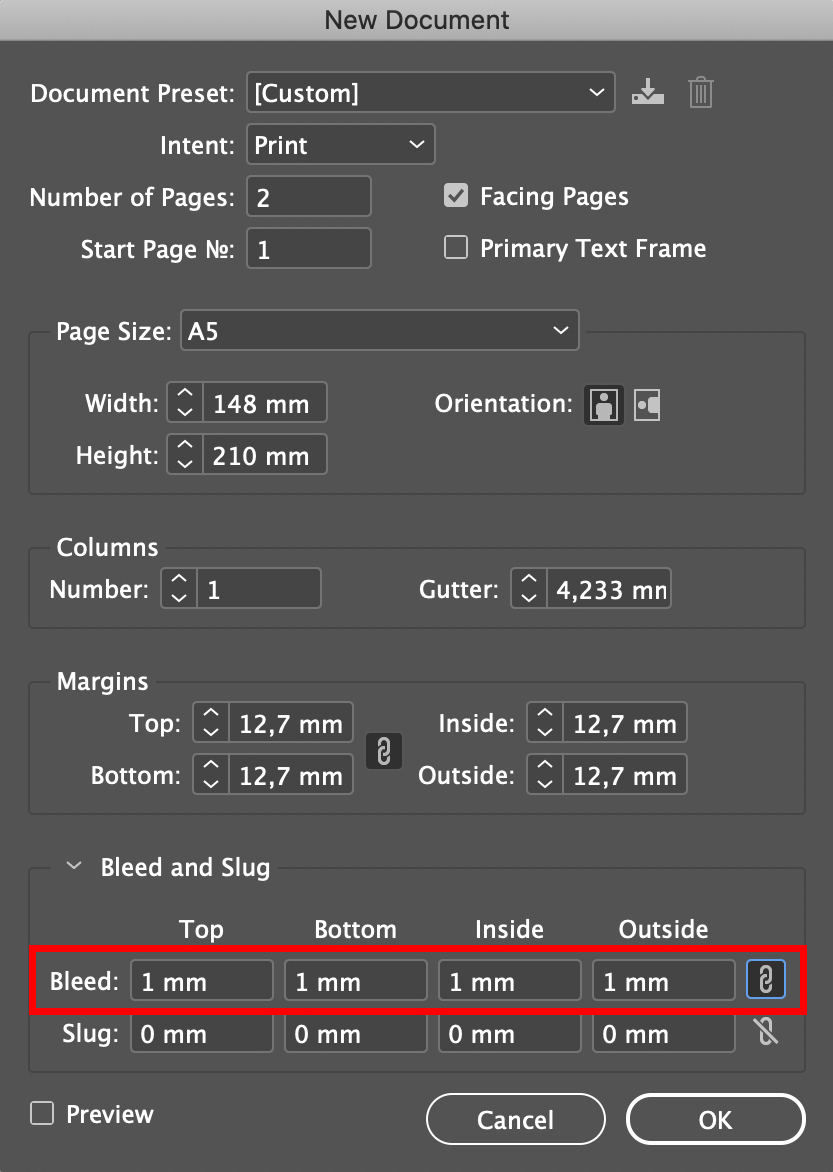
- Create your document by clicking File > New > Document.
- From the Presets menu, select a predefined page format or enter the width and height for the final size manually.
- Enter the correct values for the bleed as appropriate.
Step 2:
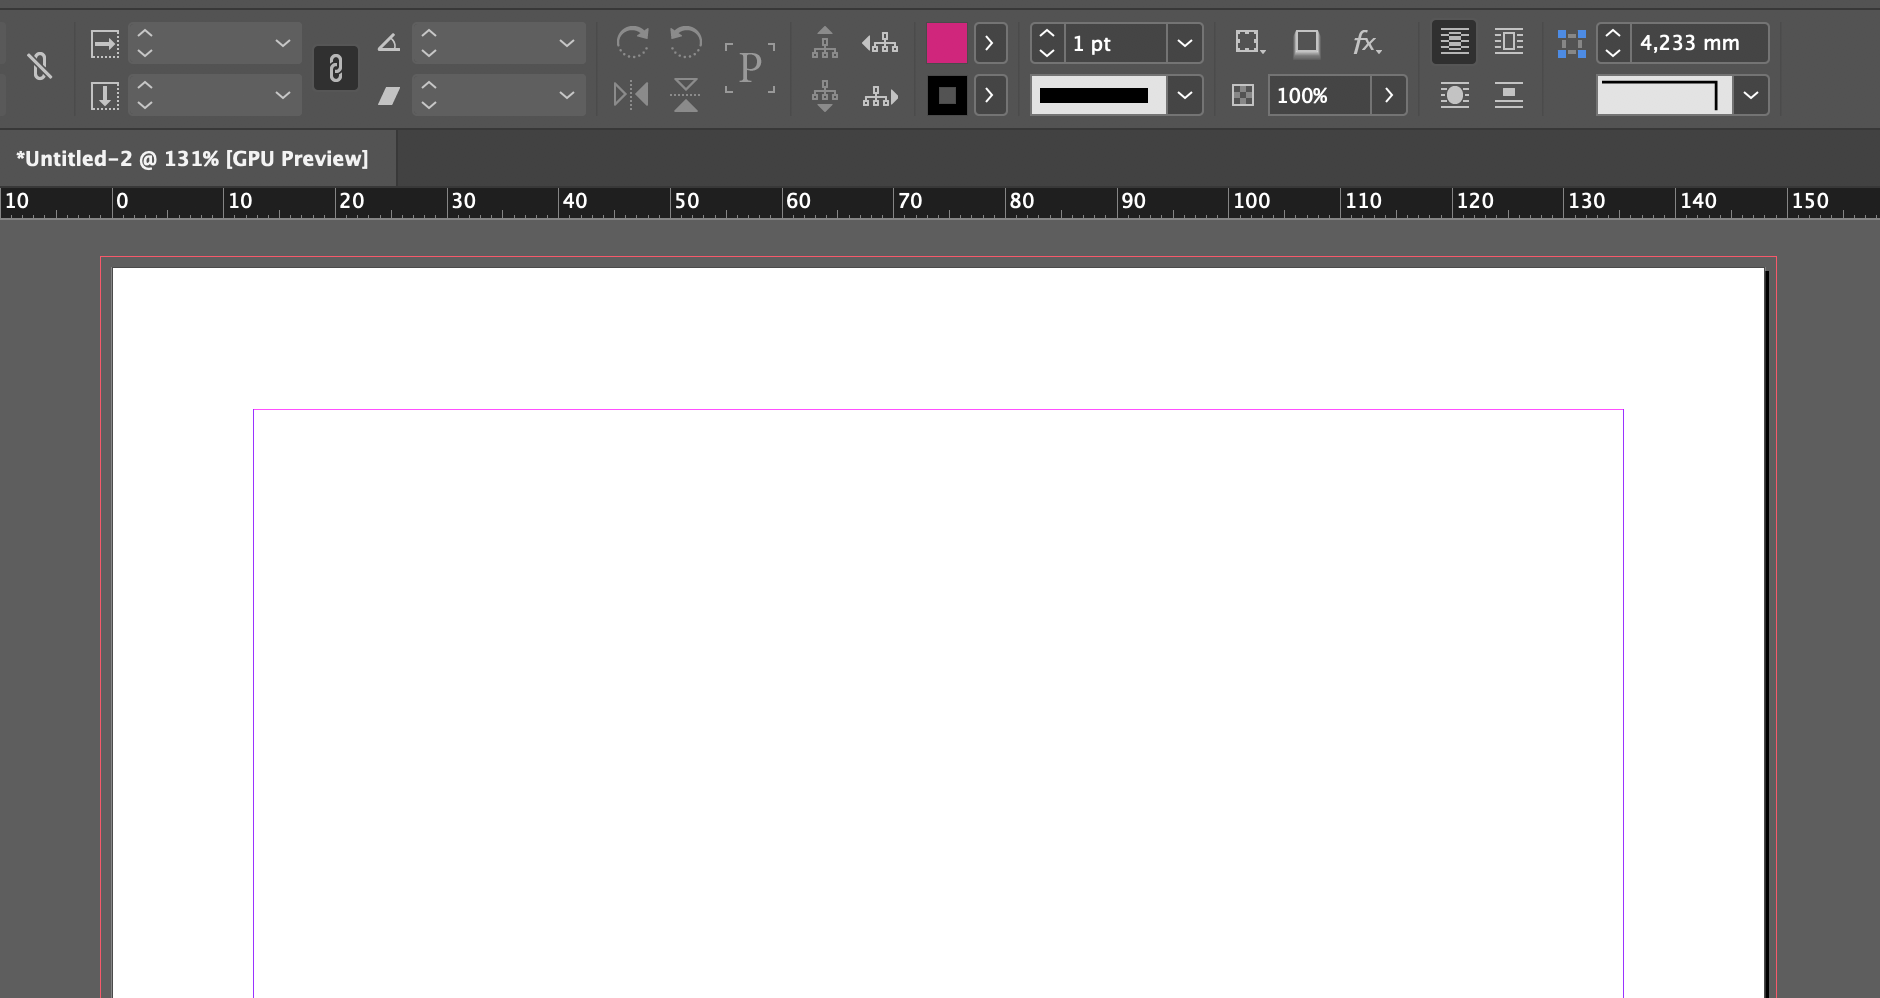
- When viewing your document in Normal screen mode, a red box showing the bleed limits is displayed around the page.
- Place all images and graphics right up to the edge of this box to ensure that there are no white margins in the PDF.
Step 3:
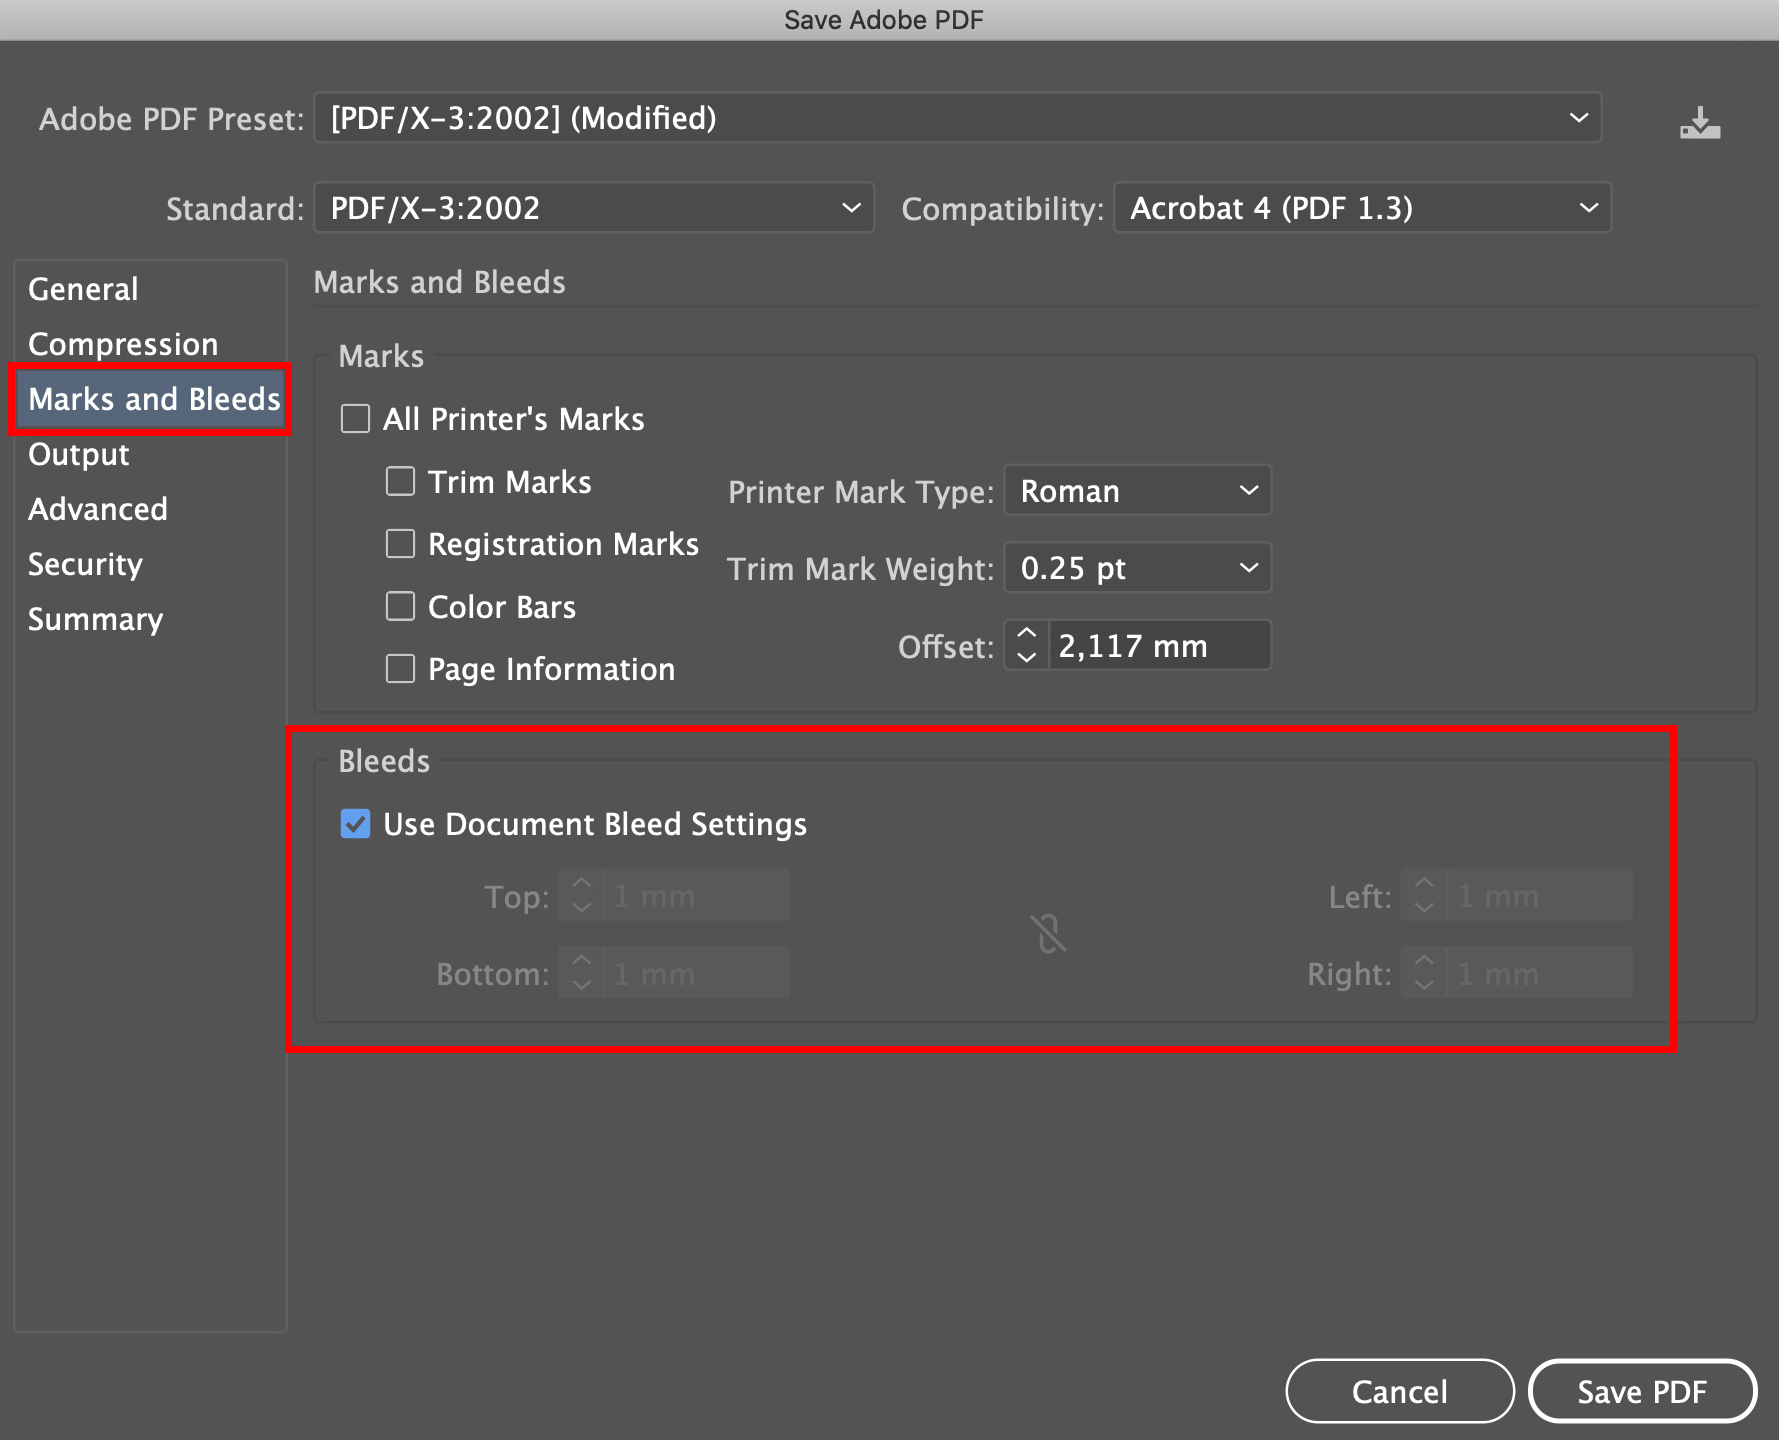
- When exporting to PDF, select the “Use Document Bleed Settings” option under “Marks and Bleeds”. Please ensure that none of the “Marks” boxes are checked.
Illustrator
Step 1:
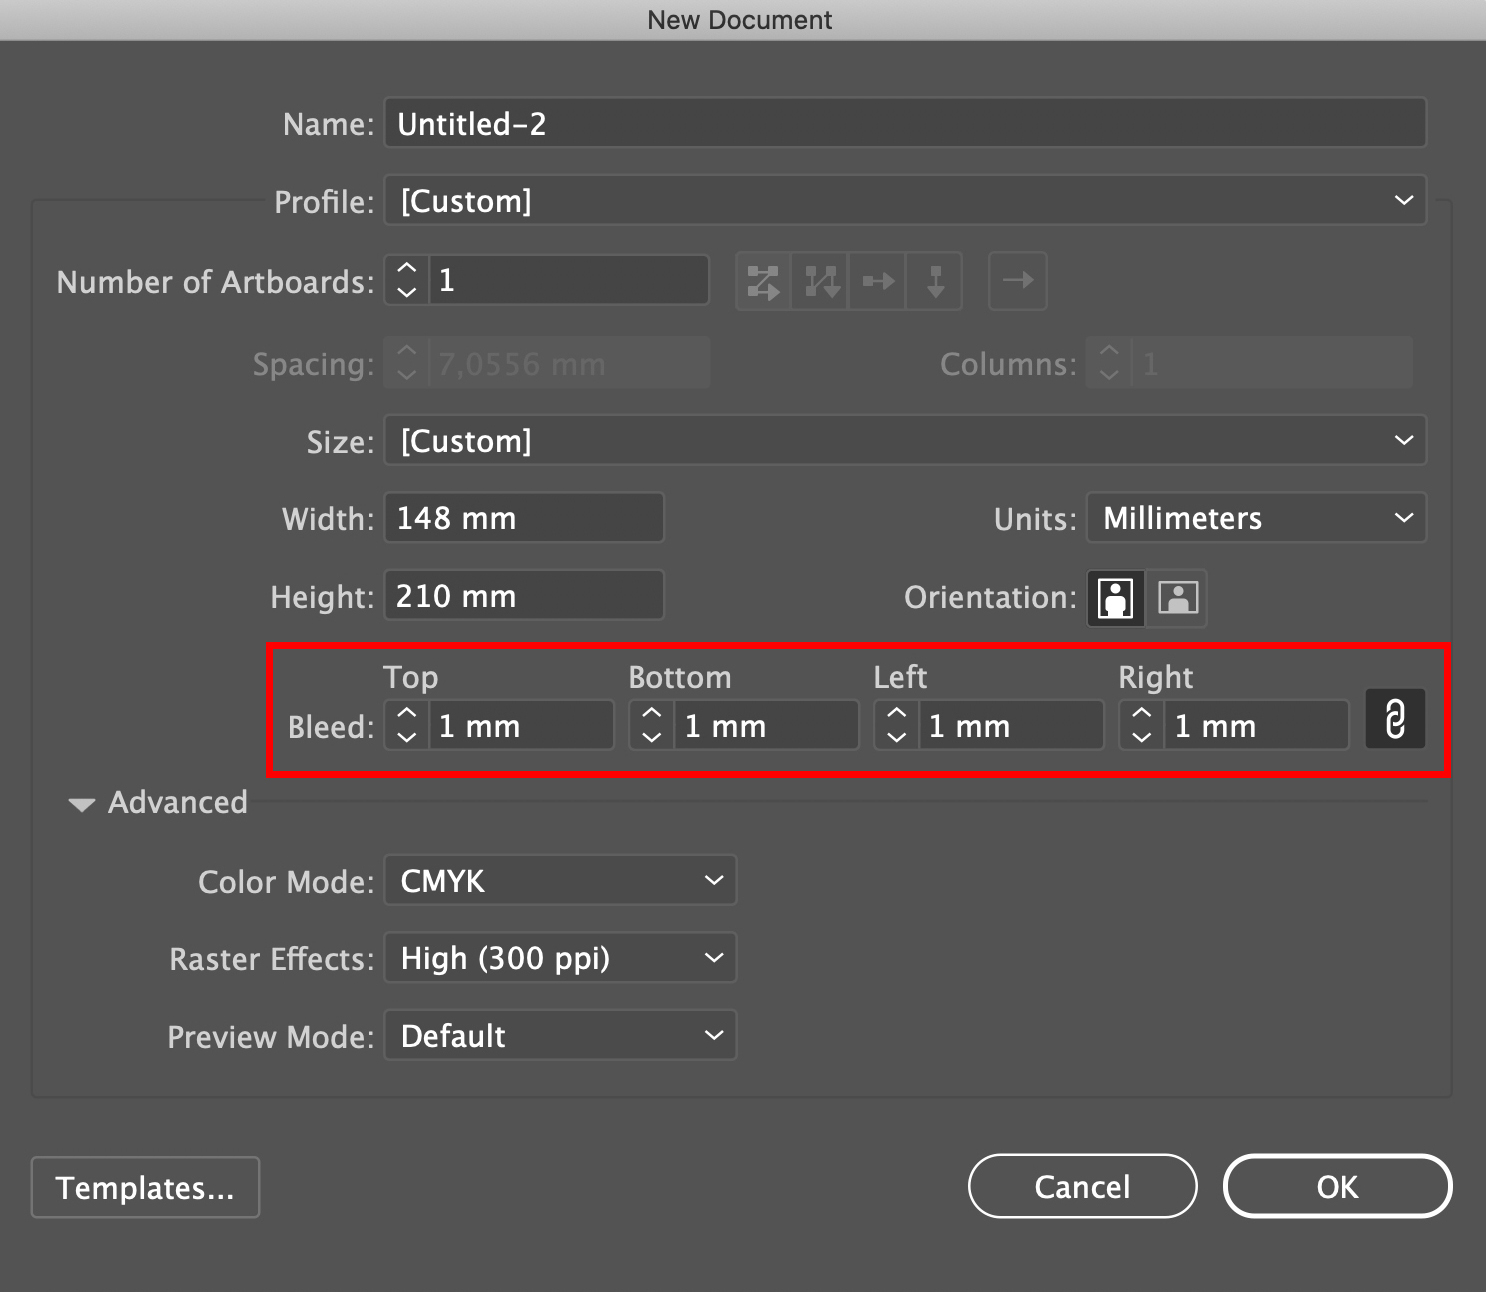
- Create your document by clicking File > New.
- From the Presets menu, select a predefined page size or enter the width and height for the final size manually.
- Enter the correct values for the bleed as appropriate.
Step 2:
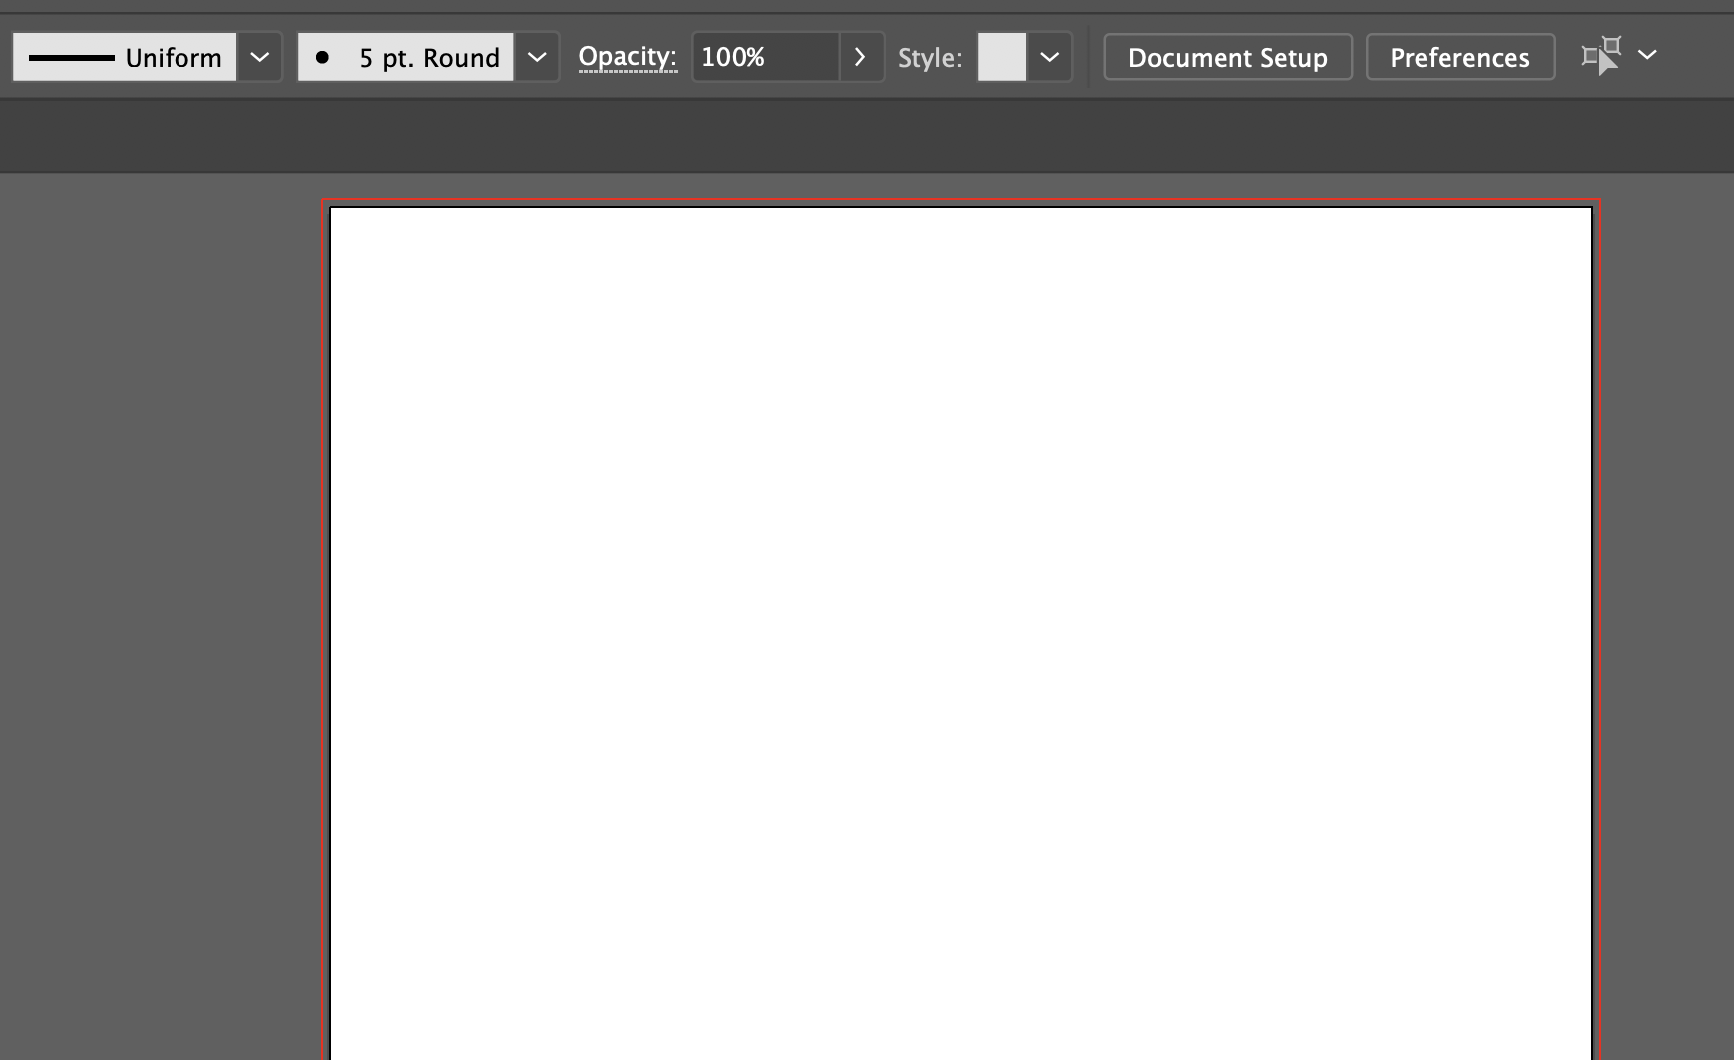
- A red box showing the bleed limits is displayed around the page.
- Place all images and graphics right up to the edge of this box to ensure that there are no white margins.
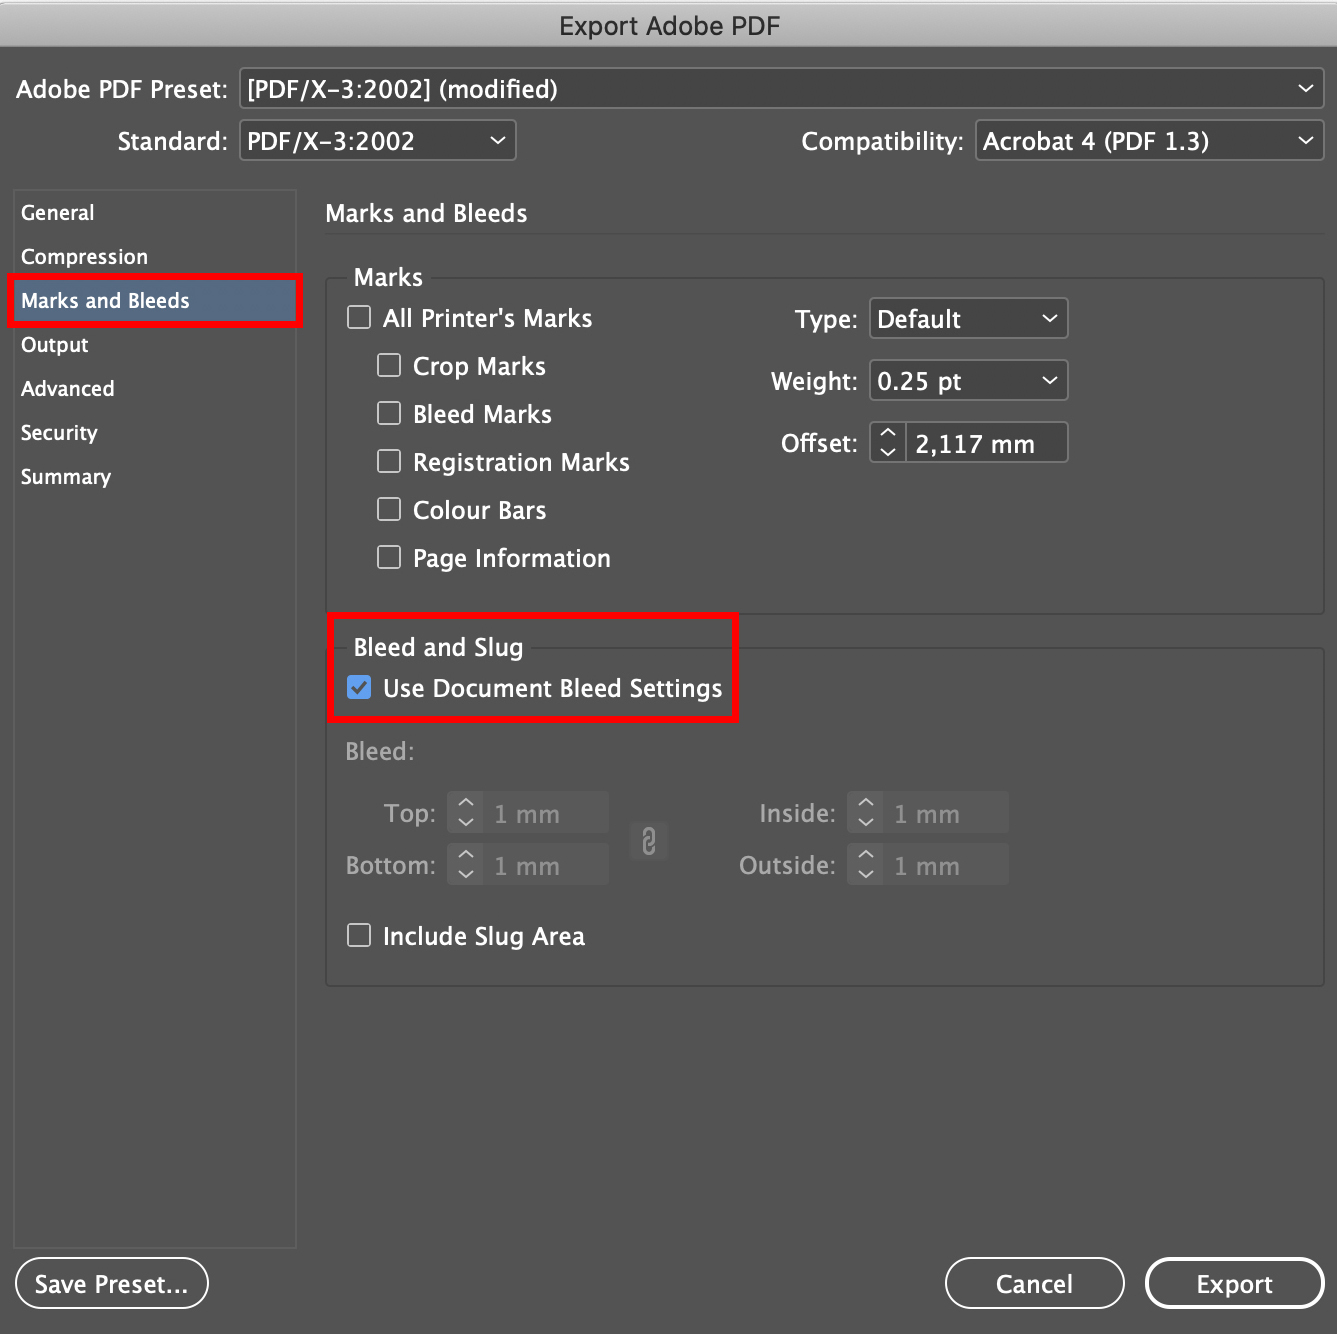
Step 3:
- When saving as PDF, select the “Use Document Bleed Settings” option under “Marks and Bleeds”. Please ensure that none of the “Marks” boxes are checked.
1mm seems like nothing, doesn’t it? You’re right, but in print it is enough to make a big difference. Our experts on the cutting table work so precisely that this efficiency means lower costs and less waste. Great news for you – and the environment! However, you still need to ensure that your designs comply with the recommended text margins and spacing for other key elements. These, along with the bleed settings are all specified in the data sheets for each of our products.
Hi you used wrong screen shots at the illustrator info the pictures are not from illustrator but from Indesign and other way the pictures at the Indesign are not from Indesign but from illustrator
Hello Nina.
Thanks for your comment. We fixed the wrong pictures now. Have a nice day!
Doreen