|
Diesen Artikel vorlesen lassen
Getting your Trinity Audio player ready...
|
Transparency is a favoured stylistic device of designers. However, it is often necessary to flatten transparency when preparing to print. What does that mean?
Graphic design software applications provide users with many different ways of unleashing their creativity. These include the use of transparency, for example in the form of lower opacity, drop shadows or anti-aliasing. In order to print these transparent areas in a way that coincides with the designer’s wishes, it is generally necessary to flatten the transparent elements. But if that sounds like a fiddly, complicated job, it is actually quite easy.
Transparency in InDesign, Illustrator and Acrobat
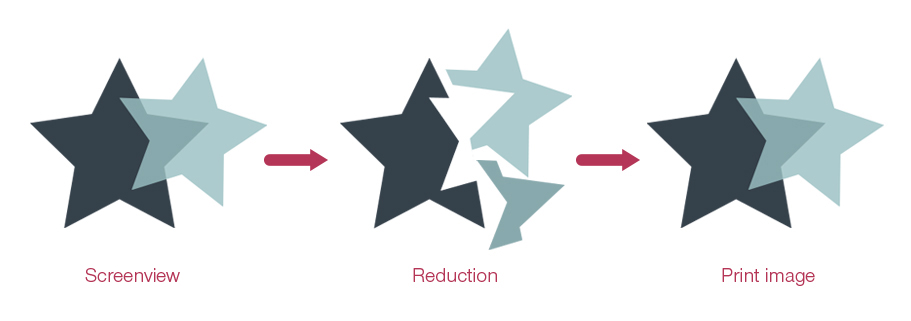
Transparent areas are created when an image or a text is placed over another element without completely obscuring it. When the transparent area is flattened, the individual components that create the overall image are split up and merged into a single layer, in other words converted into information that can be processed by the printing machinery. Specifically this means that it is converted into pixels or split into segments with different colours.
Usually there are no problems, however difficulties may arise if there is excessive use of transparency. This includes the use of shadows on gradient fills, for example, transparency on special colours, or the use of very small font sizes. Therefore you should always use the Flattener Preview to check your design. This can be accessed in InDesign by clicking Window > Output > Flattener Preview; in Illustrator the command is found directly within the Window menu. In Acrobat you can access the Flattener Preview in Tools > Print Production. Select the “High Resolution” flattener option for printing. In InDesign you can also enable the “Automatic Update” option so that you do not have to keep on updating the preview manually.
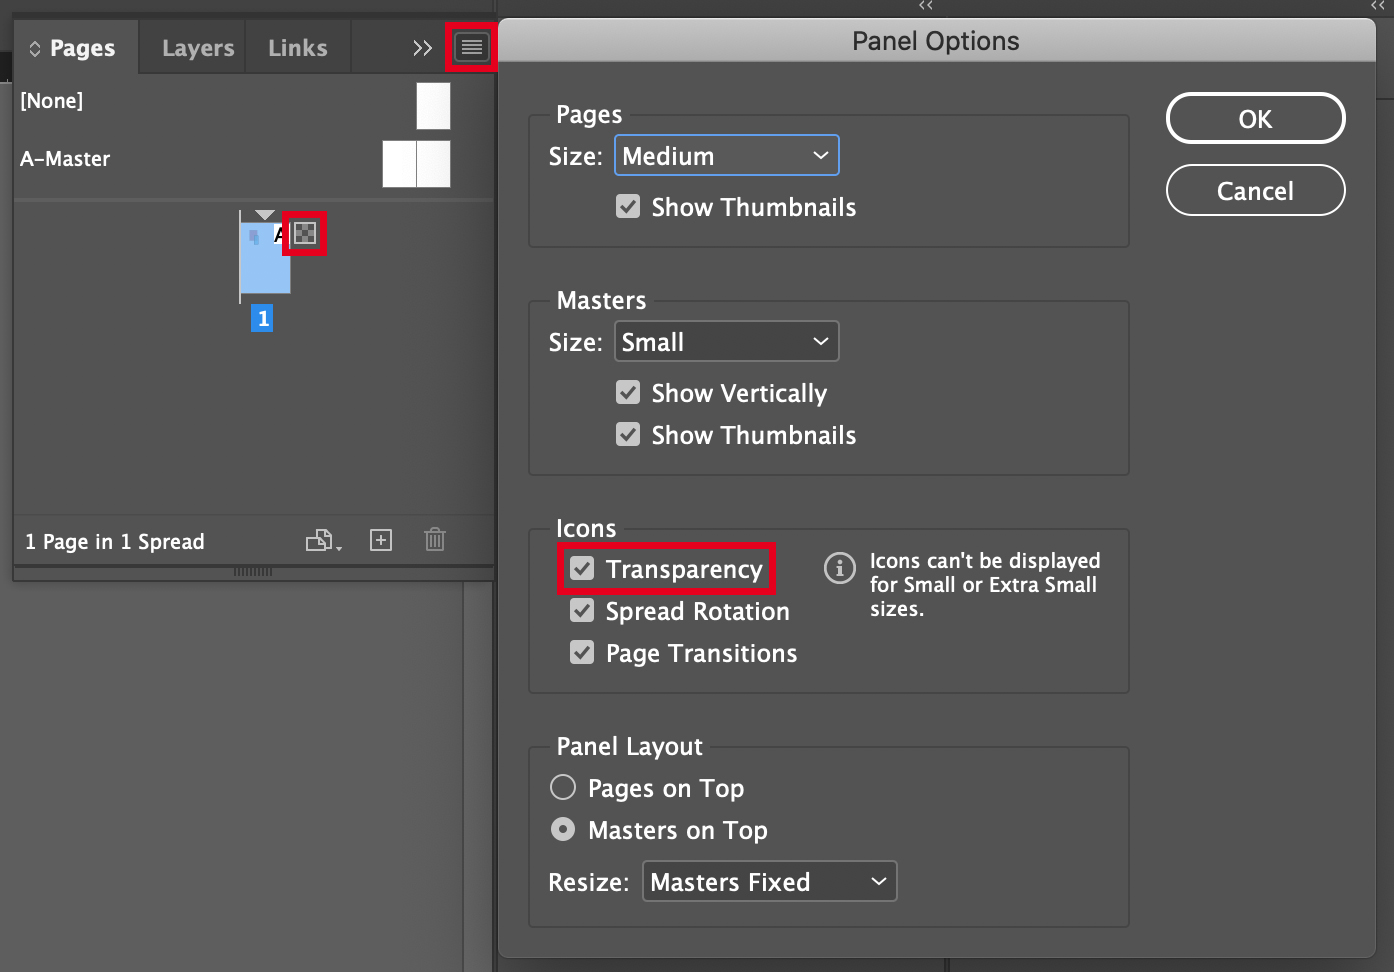
The InDesign Pages menu can be customised to allow you to check whether your design actually contains transparent areas: In the Panel Options, enable the icon for Transparency so that it is displayed in the Pages panel. A small chequered rectangle is now displayed when a transparent element exists on the corresponding page.
Flattening transparent areas in PDFs
If a correct PDF is exported from the source application there is generally no problem using transparency. This is flattened automatically during the export process, at least when you select PDF/X-1a or PDF/X-3. However, products that permit the supply of PDF/X-4 files allow transparent areas. This is the case for textiles, for example, whereas the typical format for traditional print products is PDF/X-3:2002.
Using transparent areas in your design is basically not a problem, even if it appears difficult at first glance. As long as you do not go overboard and remember the points explained here (especially using the correct PDF export format), transparency will not be an issue in your design. In fact, you can use it in the design for your brochures, flyers and folded leaflets to make them look even more professional.